Sunday 29 January 2012

New Kiev Defence Force part 2 - Infantry and Support

The footsloggers for my NKDF are from the excellent Oddzial Osmy NVL, purchased through Fighting 15's here in the UK.

All figures got a GW Chaos Black basecoat and then an overspray of Army Painter Camo Green. They were then painted using the Coat D'Arms WW2 US paint set, also purchased from Fighting 15's.

These paints are much more liquid that I'm used to, so needed a bit of getting used to. They covered well, though, and the colour choices gave for a good, military feel (as they should do!). GW flesh, black and boltgun metal were also used. The figures then got a Devlan mud wash and were based in the usual way.

Foot infantry with LMG and LAW's

Heavy Rifles - I'm using these as an assault squad armed with automatic shotguns. They get spiffy gold Oakley style sunglasses.

Command figures.

ATGM teams with laser designators.

Specialists. Chap in the centre has a laptop, and the chap on the right has some sort of tricorder/techscanner thingy.
 At SELWG last year I picked up a CAV mech from a bargain bin for £1 as it had damaged packaging and was supposed to be missing parts. I couldn't see what was missing, but thought for £1, you can't really go wrong. he mech was painted in the same way as the vehicles in the first part of my NKDF article, but I tried to add some battle damage to it. There are a few paint chips here and ther, but with the chocolate chip pattern in the camouflage, they just sort of blend in. Nevertheless, for £1, I think the NKDF got a bargain!


At the moment they are waiting for a warm, sunny day when I can varnish them all, so are languishing in a temporary storage location. Here's shot of them all together, with an interloping GZG Bulldog scout car and the dead marines, both from my last TW batrep:


Saturday 21 January 2012

New Kiev Defence Force part 1 - Vehicles

One of the forces I'm working on for Gruntz and Tomorrows war is a mid-tech mechanised infantry platoon, with some mech support that I'm calling the New Kiev Defence Force. They are based on Oddzial Ozmy's New Vistula Legion troops and Old Crow vehicles.

I've picked Old Crow as their designs are nice and simple but retain a good sci-fi vibe. Most of my other vehicles are GZG and I also wanted to try out another supplier. They are also very cost effective.

I have to say, I'm very impressed. The designs were clean and easily put together with well fitting parts. I didn't have any sanding to speak of and there was no appreciable bubbles or miscast pieces. They are big, however. I have a very old 15mm LAV from Skytrex or CMD, I think, and the similarly proposed Claymore APC is easily twice the size! Granted, the LAV is a little under scale, but the Old Crow stuff is BIG.

All of the vehicles were undercoated with Tamiya fine grey undercoat, then a base coat of Army Painter green was over sprayed. A camouflage stripes of GW Orkhide shade were painted on and then a scatter pattern of black dots with grey dot slightly offset was painted on to the darker green in groups of 3. This is based on a Ukrainian taiga pattern used by their paratroop units. I then picked out tyres, treads and gun barrels in black and grey and added a few dots of red for sensors.

I then added a few water slide transfers to them. I had picked up some numbers and unit markings from Fighting Piranha Graphics. I've no idea what the unit markings are - they are from the CAV lists somewhere, but I liked the double headed eagle. My method for applying transfers has changed recently. I previously just used to slap them on and hope for the best, but now i take a more methodical approach that pays dividends.

Firstly paint a thin layer of gloss varnish over the area that will be getting the transfer. This gives the transfer a nice, smooth surface to adhere to. Water slide transfers hate rough surfaces and tend to sit above them, resting on the peaks. This leads to air being trapped and a "silvering" effect. I use Windsor and Newton Acrylic Gloss that dries quickly and leaves a nice finish. Once dry soak the transfer in water and apply to the model. Slightly warm water will speed up the process. The transfer can be manoeuvred into place using tweezers, brushes or whatever. Lightly press it into place with a paper towel.

I then apply a couple of drips of MicroSol softening fluid. This softens the transfer and helps it settle onto the surface, following the folds and contours of the model. For very lumpy of textured surfaces you may have to add this several times, but be aware that as soon as the first drop is added the transfer becomes very soft and will easily tear if you try to move it. Once I'm happy with the position and if it's flush to the surface I'll apply a drop or two of MicroSet which makes the transfer more "sticky" and less likely to lift off the surface. You can also apply this to the surface first if it's a simple, flat area and the transfer will have better adhesion. Once this is dry the transfer gets another film of gloss varnish to seal it in.

I then give the models a coat of Games Workshop Hard Coat, which has a slight satin finish and covers the gloss up nicely. Over the top of this I then start adding weathering effects, starting with a dilute wash of devlan mud all over and then a full strength was targeted at the panel lines and joints. Once that is completely dry I use a mix of the mud and medium sand from Tamiya Weathering Set A to add mud and dust. The mud tends to get added in smears with the foamy bit of the included tool, and the mid sand is brushed on over highlights. I then add a few scorch marks from weapon hits and  burn marks around exhausts and gun barrels using the soot from Tamiya Weathering Set B. I also used some MIG pigments on tank number 35.

Once complete the miniature is hit with a blast of testors dullcoat to bring down the shine from the GW hardcoat and seal in the pigment. This does dull down the ones that are brushed on, so it pays to be a bit heavy handed with them.

Anyway, enough talk, here is the eye candy:

Claymore Heavy APC
Two auto cannon armed variants on the left and a support version on the right.

Just noticed that no. 50 has a damaged turret here - must have been dropped at some point.


Sabre Heavy Tank

You can see some silvering on the transfers on number 34. Look carefully at the warning symbols on the missile launchers and engine cover. I forgot the base coat of gloss varnish.

Tank 35 got some extra shading after the dullcoat with MiG pigments.

Wednesday 18 January 2012

Kitbashes part 2 - the WIP's

A second lot of kitbashes today.

Firstly, a simple addition to the excellent Sabre Class Dropship by the supremely talented Mr. John Bear Ross. I love the Sabre, both the dropship and gunship versions. When no one is looking, I like to fly mine around the room making "neeeeeeeeooooow! vwoosh! dakka-dakka-dakka!" noises.

There is only one small problem with it, when landed it rests on it's chin mounted Gatling cannon. There are 4 pads at the corners of the pod section, but they don't quite reach the ground. I can imagine the pads from the pod extending, or the dropship hovering and dropping the pod, but I wanted to be able to depict it landed on the ground.

I had some styrene strip lying around, and came up with this:


I think it adds to the model in a complimentary way, and reminds me a bit of the choppers in Avatar as well.

The second kitbash is an attempt to reclaim some figures that have been languishing in my lead mountain for about 10 years. They are old 25mm GZG Landmate Suits which I don't think are in production any more. There are lots of more modern figure designs for amazing mecha from CMG, Rebel, DP9, Zandriz IV, ArtCrime and many others, and these look very dated in comparison.

To be fair, they aren't great figures. The detail is sketchy at best and they actually look nothing like the Landmates from Appleseed that thy are supposed to be, but at the time they were all that was available. I've decided to try and re-purpose them for 15mm as early versions of mecha instead,


Both figures have had 6mm MRLS packs added to their left shoulders as missile packs, and small 6mm Gatling turrets to their right shoulders as a form of CIDS (close in defence system, like Trophy or a tiny CIWS). They have had a couple of spare bits from a VOTOMS kit glued to the front of the helmet as a sensor cluster and the guns have been cut down and re-built with Greens Stuff, styrene strip and spare barrels from some Old Crow vehicles.

I think the make or break will be the paint job on these guys. Without hacking them to pieces or going mad with the Green Stuff - which I'm not much good at - this is about as good as they'll get for now. I may add another sensor of some kind to the front of the helmet and possibly add some sort of backpack. 

Sunday 15 January 2012

A couple of kitbashes and disasters with salt and hairspray.

I decided I wanted to try out a technique I'd seen in a few modelling magazines recently called the salt and hairspray method. It's used to produce a very realistic weathering effect (when done right) for very old, distressed and rusty metal, simulating chips and stains and a patina of rust.

Basically, you paint an undercoat on, usually black, then a base coat of "rust" colour. Then you spray the model with hairspray and sprinkle on salt, both the larger flaked "Maldon" type and normal table salt granules. The salt is placed wherever you want the rust to show through and the tiny salt crystals mean you can get a really random arrangement. Then you then paint on your topcoat. Wait for it to dry and then scrub away the salt with an old toothbrush.

There's a bunch of good guides of how to do it on the Internet (certainly better than mine) but this one is a good start: How to do it right

I picked up an Airfix Mk 1 Male Tank from Hobbycraft recently, with a mind to turn it into some sort of Punkanaught Battlewagon of some kind. It's the inspiration for no end of GW vehicles, the Land Raider and the Chimera and the Leman Russ can all draw their origins back to this design, and with a few additions from the bits box I had a suitably scifi vehicle.
I chose a nice brown base coat and roughly sprayed some lighter brown on as well for a mottled look, then went at it with the salt and hairspray. So far, so good.

I then made three mistakes. Firstly, I over sprayed the hairspray again twice, sealing the salt into a nice, hard lacquered layer. Secondly, instead of gently airbrushing on the main colour I stippled on GW foundation paints. In hindsight, I should have remembered that the GW foundation paints will and do cover ANYTHING in a layer of paint that is pretty much impenetrable by any device known to man. Thirdly, I chose a red and orange camo scheme. I'm thinking that the GW meme must just have overtaken me. Why I didn't go for a nice, neutral green, or grey or tan scheme is a mystery to me.

Once the paint had dried (or set, might be a more accurate description) I started in with a toothbrush to scrape off the salt. I started off lightly and gradually increased the pressure and nothing happened.

I then started in with my Dremel.

Clearly all reason had left me at this point as I began with a soft polishing attachment and moved on from there through the various nylon brushes until I ended up with a steel wire brush attachment. The smell of melting plastic brought me back to my senses and I put the power tools away.

The hairspray, salt and GW Foundation paint mix had set into a sort of lurid red and orange Chobham armour coating that I was beginning to think might actually be useful to the MOD in some way.

In a last ditch attempt at salvaging something before I dumped it all in a big pot of Dettol Pine disinfectant that I use as a paint stripper for plastic and resin kits, I washed it under the tap and had another go with the toothbrush. The water seemed to work, and with some vigorous brushing the softened paint gave and the salt below was exposed. I let it dry, touched up the bits I had ground away by mistake and added the metallic bits and here are the final results:

Note the wrecked detail on the windows and hatches

Added Old Crow gatling on the front and GZG guns in the sponsons


The end result is OK, certainly fine for gaming purposes, but it's not what I wanted. In retrospect, the Red and Orange camo was a terrible idea with a brown rust base. I should have gone for more of a contrast, like the tan colours in the example above. I also had to paint over all the white plastic exposed by my manic Dremel attack. Still, you have to admit that it certainly looks battered and weathered.

I left the "tail" steering unit off and when I looked at it it reminded me of a gun carriage. I had another dig around in the bits box and assembled this from the "tail", some styrene tube, spare AA gun barrels from an Old Crow tank, a couple of Old Crow 6mm missile turrets and some ammo clips from a 1/50th VOTOM kit:


It also got the salt and hairspray treatment, but seems to have fared a little better. I always loved the original mechanic for Thudd Guns in WH:40K where you placed 4 blast templates down, one after the other, but each one deviated from the edge of the last one. You could end up with a long chain, or with them snaking back on themselves, or a totally random mess, and this was created in honour of that.

I also thought I'd have a go with some MIG pigments that I picked up at a model show last year. I used them very sparingly to tint some ground clutter that i was making a while ago, and chucked them back in a box and forgot them. I usually use Tamiya pigments in the little compacts (what AGG calls my geek makeup) to very satisfying effect. The Mig pigments went EVERYWHERE though. I got a blob on one of my fingers and didn't notice and now have orange rust stained figerprints all over my camera, the lightbox, my clothes the ketboard and all the minis handled until I noticed it - there's agreat big blob on one of the barrels of the Punkanaught, I just noticed . Clearly more practice is required.

Tuesday 3 January 2012

Tomorrows War AAR number 2

After our last game of Tomorrows War we were left a little underwhelmed. The disparity between troop types had made it a turkey shoot for one side. However, we decided to give the game another go and play another scenario. We had 3 players this time, my brother and my two nephews (Goblin, 11, and Orc, 13, - get 'em young!) and I was referee and rules looker-upper. Goblin chose to lead the Green Berets and was suitably hyped up on Pepsi Max and doughnuts to approximate the adrenal boosts that the Green Berets had.

We chose Last Stand at Red Ridge. A small group of US Green Beret's have dropped from orbit and landed off course behind enemy lines. They are trying to regroup but the enemy is closing in from all sides...

The US forces are equal in quality to the approaching Brazilians, but are equipped with powerful suits of powered armour (I told Goblin they were like Iron Man suits - he liked that), with advanced sensors, Gauss machine guns and autodocs to keep them patched up.

The initial set up was as in the map and diagram below, with the Green Berets (the blue icons)  on the slopes of the eponymous red ridge, but split up, and the Brazilians (the green icons) approaching from all sides. The light green is dense jungle and the brown is light jungle (it's the Amazon). To the SW of the ridge line is a dense boulder field which is heavy going and provides hard cover. The sides of the ridge line also provide hard cover as they are scattered with gullies and boulders. The Green Berets would make good use of this cover....

Map view of setup - US in Blue, Brazilian in Green
View from the south table edge. US in Blue and Brazilian in Green
The first turn saw the Green Berets move towards each other, with squads 2 and 3 moving directly towards one another, and squad 1 moving straight up the ridge line. The Brazilian forces couldn't see any of the US troops, so didn't get to react and just moved up into position.

Brazilian troops slog through the jungle.
Turn 2 saw the Green Berets to the south side of the ridge begin to move towards the crest. The Brazilian troops of Squad A and B spotted them and opened fire. The Green Berets elected to abort their move and return fire. One of the Brazilian squads, team A, failed it's reaction check with a 1 and thus prompted a Fog of War card - Excellent Position. They had found an area of jungle that offered them superior cover. The other squad, Team B, took fire from Green Beret squad 2, causing just one casualty. They returned a huge volume of fire and managed to score 9 out of 10 hits on the Green Berets! Both suits went down, the Autodocs pinging away.

Green Beret Squad 3 then moved to advance up the hillside as well, prompting both Brazilian Teams to again react and pour fire on. Again the Green Berets aborted their move, hunkered down and returned fire. They won one reaction test and lost one, and the Brazilians again rolled a 1 for a Fog of War card. A random member of the Brazilian forces encountered a natural hazard and was injured. One of the Grunts in squad C stepped on a snake and got himself seriously Injured.

I then made a big error here and totally forgot that Team 3 had a AP/AT4 missile pack and instead just gave them the Gauss SAW the same as the other teams. They could considerably have made a much bigger dent in the Brazilian teams at this stage, but the vanilla SAW just didn't put out enough firepower to dent the Brazilians. Team 3 weathered the incoming fire from Squad A, fired on Squad B causing a couple of casualties and was then peppered in return by squad B to no effect.

The Brazilian armoured car trundles through the jungle.

The US Green Berets, far from home, with no hope of rescue, surrounded by enemies on all sides, decide to go for a nice stroll.
Turn 3 saw the US troops lose the initiative, which they never recovered. From now on they were simply reacting to the Brazilian moves. Brazilian squad A and B opened fire on US team 3, as team 2 were no longer combat effective (they were still casualties as their turn hadn't come round to determine what their wound state was). The US lost the reaction test and were peppered, both becoming casualties.

On the North side of the ridge, Brazilian Squad C had finally found their way out of the jungle. Opening fire on the Green Berets of team 1, they lost the reaction test with ANOTHER 1. The Fog of War card indicated that a thick mist had dropped and all movement was reduced to tactical and no fire combat could be conducted at further than 18 inches. The armoured car and (we decided) the powered armour suits were immune to this as they had thermal imaging systems (I couldn't actually see in the rules that the PA suits had advanced sensors, but we figured it'd be a pretty rubbish suit of $3 billion  powered armour if it was stopped by mist...).

Squad C and the armoured car fired on team 1, to no effect (Orc found the string of 7's and 8's from Goblin to most annoying). Team 1 then advanced onto the crest of the ridge and team 2 and 3 made their casualty checks - one light and one serious wound for team 3 and both of Team 2 were A-OK.

Turn 4 opened with The US again losing initiative. Brazilian squad 2, snug in their improved position, fired on team 2. The exchange of fire resulted in both suits falling as casualties again to no real effect on the Brazilians.

The Green Berets take fire. Two unconfirmed casualties on the right and a light and serious wound on the left.
 Brazilian Squad B fired on US team 3, winning the reaction test and knocking them down as casualties again. They then advanced down off the ridge towards the downed suits.

On the North side of the ridge the Squad C were now out of sight of team Team 1, now lost in the mist at the crest of the ridge. They advanced out of the jungle, cautiously looking for snakes. The armoured car, however, could see team 1 just fine and blazed away with it's Gatling laser and Gauss SAW, knocking both suits out as casualties. All of the US suits were casualties now, and as their turn rolled around they made their first aid rolls.

Tragically, team 2 and one member of team 3 failed their rolls and were KIA. The last remaining member of team 3 was still seriously wounded, so combat ineffective. Team 1, on the top of the hill suffered a serious wound and a light wound, halving their firepower.

Turn 5 opened with the US again losing the initiative. Brazilian squad B advanced on the last member of Team 3 to capture him. At the last moment his triggered his self destruct mechanism and as the Brazilians closed on him he detonated in a blast of flame. The quick witted Brazilian troops, however, managed to dive away from the blast and his sacrifice was in vain.
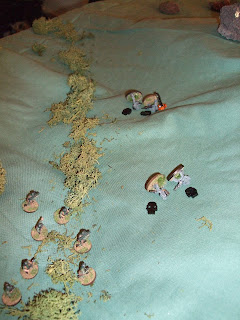
The smoking remains of Bravo-2 and Bravo-3 are inspected by Squad A as they move out of cover.

On the north side of the ridge, squad C continued to creep out of the jungle, and the armoured car did a hill climb up the side of the ridge, spraying fire at Team 1 as he did so. Team 1, reduces to just 1 combat effective figure, unable to hurt the oncoming armoured car and seeing the Brazilians closing from all sides, sprayed fire down onto Squad C and prepared for their last stand.

Turn 6.

The Brazilians again won the initiative (although only because you retain it on a tie). The armoured car advanced still closer, spraying fire over team 1. Both suits fell as casualties. Squad B, bloodied by the self destruction of Team 3, advanced cautiously.

Last Stand at Red Ridge.

The two green Berets, crawling through the Amazon mud, tried to trigger their self destructs as they were surrounded by Brazilian troops - anxious not to be interrogated by the brutal Brazilian Secret Police. Through a haze of blood, Bravo-1-Bravo triggered the charges and his suit brewed up. Bravo-1-Alpha was not quick enough, however, and the Brazilians of Squad B surrounded him and took him captive, to disappear into an Amazonian prison camp....
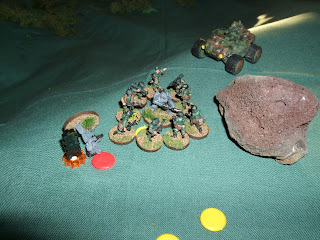
For you, Yanqui, the war is over...
However, despite the eventual loss of all of Bravo Squad, the Brazilians had failed to capture or neutralise the US troops quickly enough. Their brave and defiant last stand was captured by a US recon drone, the last moments of the film showing the brutal treatment that the wounded Bravo-1-Alpha suffered.


The Brazilian objectives were to capture or kill quickly. The US objectives were to hold out as long as possible. The final victory point score was Brazil 8, USA 10, so a marginal (and pyrrhic) US victory.

In summary, we all enjoyed the game, but felt there were still a few areas open to improvement. The Brazilians were constantly frustrated that they might score 6 or 7 hits on one of the Green Beret teams, but only cause 2 casualties. They felt that excess hits should somehow affect the casualty roll, or prompt multiple wounds.

The US player felt that his fire should have been more effective. There was some discussion about squad size vs firepower, but I think the weapons on the PA suits were just underpowered. A two man squad, firing on the Brazilians, had 5 dice. 2 basic firepower (2 man team), +1 each for the Gauss SAW, +1 for the tech level advantage for 5 dice. I haven't re-read the rules, but I have a sneaking feeling that the Gauss SAW negates some or all of the targets armour.

One player also felt that the basic mechanic of FP vs Defence dice should be changed. His opinion was that defence should be static - it's not an opposed roll - as the song says, you can't dodge a bullet. I advised that the defence dice represent taking best use of cover and so on, but his retort was then why add extra dice for cover and armour? Either the armour works or it doesn't.

Nevertheless, I still think that the scenario worked well. It was certainly a tense and desperate fight, that might have gone differently had I remembered the US had the missile pod. The final showdown on the top of the ridge was especially nice, as the one lightly wounded Green Beret stood watch over his badly wounded partner, Brazilian troops advancing through the mist and the armoured car grinding on towards him, Gauss rounds bouncing off it's armoured sides....