Showing posts with label Mighty Armies. Show all posts

Wednesday, 23 October 2013

Mighty Armies Campaign Game 5

My two nephews, Orc and Goblin, came over today to continue our irregular series of campaign games for Mighty Armies. We're slowly putting together a nice set of simple campaign rules, and have now introduced favoured units, random events and attrition.

The attrition rules are simple. Each leader can raise as many armies as he likes. Each turn that an army fights it has to be paid for in Gold equal to it's AP cost (usually 44). This represents wages, tribute, the cost of ingredients to keep undead troops animate or dead rats and shiny things for the Lizardmen (who love their bling). After each battle replacements for the the lost troops then also have to be paid for in the same way, or the AP cost of the destroyed units are deducted from the available pool in the next battle as reserves are drawn in to fill the ranks. After each battle the winning side also gains plunder and loot equal to 1d6 x 10 Gold. The losing side gets nothing. In addition to the two villages that generate 20 and 10 gold each, each lair now also generates 20 Gold per turn.

I've drawn up a simple random event table, and once each turn the players roll on it to see what happens:

Roll

2
Omen from the Gods: Your priests receive a fortuitous omen from the gods. You get three re-rolls to use in any of your battles this turn, and instead of automatically routing you get to choose if your army breaks when it reaches 50% strength.
3
Mercenaries: Two stands of Dwarven mercenaries (standard troop types only, no special abilities) offer to join your side for a share of the spoils. You can recruit them for double their AP cost to fight in any one battle.
4
Scouts: Your advanced scouts have found important information about your next battlefield, giving you a tactical advantage. After army setup you may move one of your units by 3 inches in any direction.
5
Healer: A healer offers to join your army for one of your battles. Once, when a unit is destroyed, roll a die. On a 4-6 that unit is instead moved back to your base-line. May not be used on flying units.
6
Struck Gold. One of your mines discovered a rich vein of ore this turn. Gain 10 Gold.
7
No event
8
Famine! One of your villages is stricken by plague and produces 10 Gold less than normal. If you have no villages left, you lose 2 AP from the next battle.
9
Plague! For the first battle this turn your troops fight at an additional -1 in for the first three turns
10
Bad Information! On your first turn of the first battle you get 2 MP less than the rolled number. If you roll a 1, you also lose 1MP from your roll on turn 2.
11
Deserters! Some of your units have fled. You have 2 AP less for your first battle this turn.
12
Raiders! You must fight off an additional attack from raiders this turn. They will have a 40p army with no flying units or spell casters and will attack the closest un-invaded territory to your HQ. Any unengaged army can be used to fight them off. If you are beaten, that territory produces nothing this turn.

I've also created a turn tracker with different seasons on it, so we can start to do some interesting things with weather if battles take place in the winter, for instance, or with gold for harvest time and planting in autumn and spring.

We rolled events for this turn and Orc, running the Barbarian Hordes, got a Famine. Goblin, running the undead army got Plague, and queried how undead troops could catch the plague. I suggested it could be an infestation of rats or bloodworms or a magical malaise that had come over the controlling necromancer. I got Bad Information - so not a great turn all round.

There are four battles this turn, as the campaign map below shows.


We fought Orc's Barbarians attacking the town (Alchemist), defended by Goblins Undead.

Both sides created their armies using 44 points and including flying units. This battle saw the début of some new units for both sides. The Barbarians had some Berserkers (Heavy Infantry, Horde, Fearless) and the Undead had a bone Chariot (chariot) and some Spectres (Heavy Infantry, Flying, Horde).

The battle lines were drawn up:


We ruled that the walled compound to the south could be entered and units placed inside, but the walls blocked line of sight and halted movement (as you had to climb over them. The round tower and the watchtower were impassible to all but flying units and the other building delineated an area of the town that blocked line of sight and was difficult going, so we'd just move them around as needed to accommodate units moving in and out of the town.

I've had a few people comment that the previous reports "helicopter view" wasn't the best, so I've tried to get a few more action shots this time. I won't do a full blow by blow account, but try and let the pictures show the sequence of events:

Skeleton scouts in the village.

The Spectres take flight and advance on the left flank, but the Barbarian Shaman binds one of them in place.

The bone beast moves up in the centre, as the Wolfpack advances on the Undead right flank.

The Spectres elect to leave the bound unit behind and continue their advance.


The Undead chariot decides to switch flanks, and races across the Undead rear area

Turn 3. The Barbarians have been plagued by low MP rolls, whilst the Undead have had good rolls. The Barbarian Berserkers are trying to engage the Wolfpack on the left, but their slow speed is hampering them, and all they can see is difficult terrain in front of them.

The Lich (general) moves up to support the bone beast and scouts in the village.

The Spectres charge the Barbarian shaman and rout him....

But are counter charged by the Barbarian King and his favoured unit of Bison Cavalry. They have the Shieldbreaker spacial ability, so get to roll two dice in the first round of combat. 

The Spectres lose a unit and are pushed back, just in time for the Shaman to blast them with a fireball.

Meanwhile, the Direwolf is charged by the Wolfpack. The Wolfpack is the Undead favoured unit and have Dragon Forged Lances (or claws, in this instance) giving them a +1 bonus to charges. They beat the Direwolf, forcing it to retreat, but their rampager ability allows them to follow up and move back into contact!

The Direwolf defends himself and routs the Wolfpack, killing one of them. He is then joined by the Barbarian King and Shieldbreaker cavalry to face the Lich. The Barbarian Shaman binds the bone beast and chariot in place, as the Beserkers slowly move into the village to try a rear attack. 

The Barbarians charge the Lich, but are driven back (terrible roll for the Barbarians, great for the Undead), losing a stand of the Shieldbreaker Cavalry. The Bone Chariot picks off the birdman who had been spotting for the Shaman. 

The Barbarians re-organise and prepare to receive charge, The Beserkers just aren't fast enough to get through the town in time to help.

Barbarians Rally, Bone Chariot snipes the Shaman and the Lich Rallies as the Beserkers amble through the village.

Barbarians decide to charge again, and are beaten back, again.  Berserkers emerge from the village, but are still too far away to help. The Barbarians only need to lose one more unit to rout.


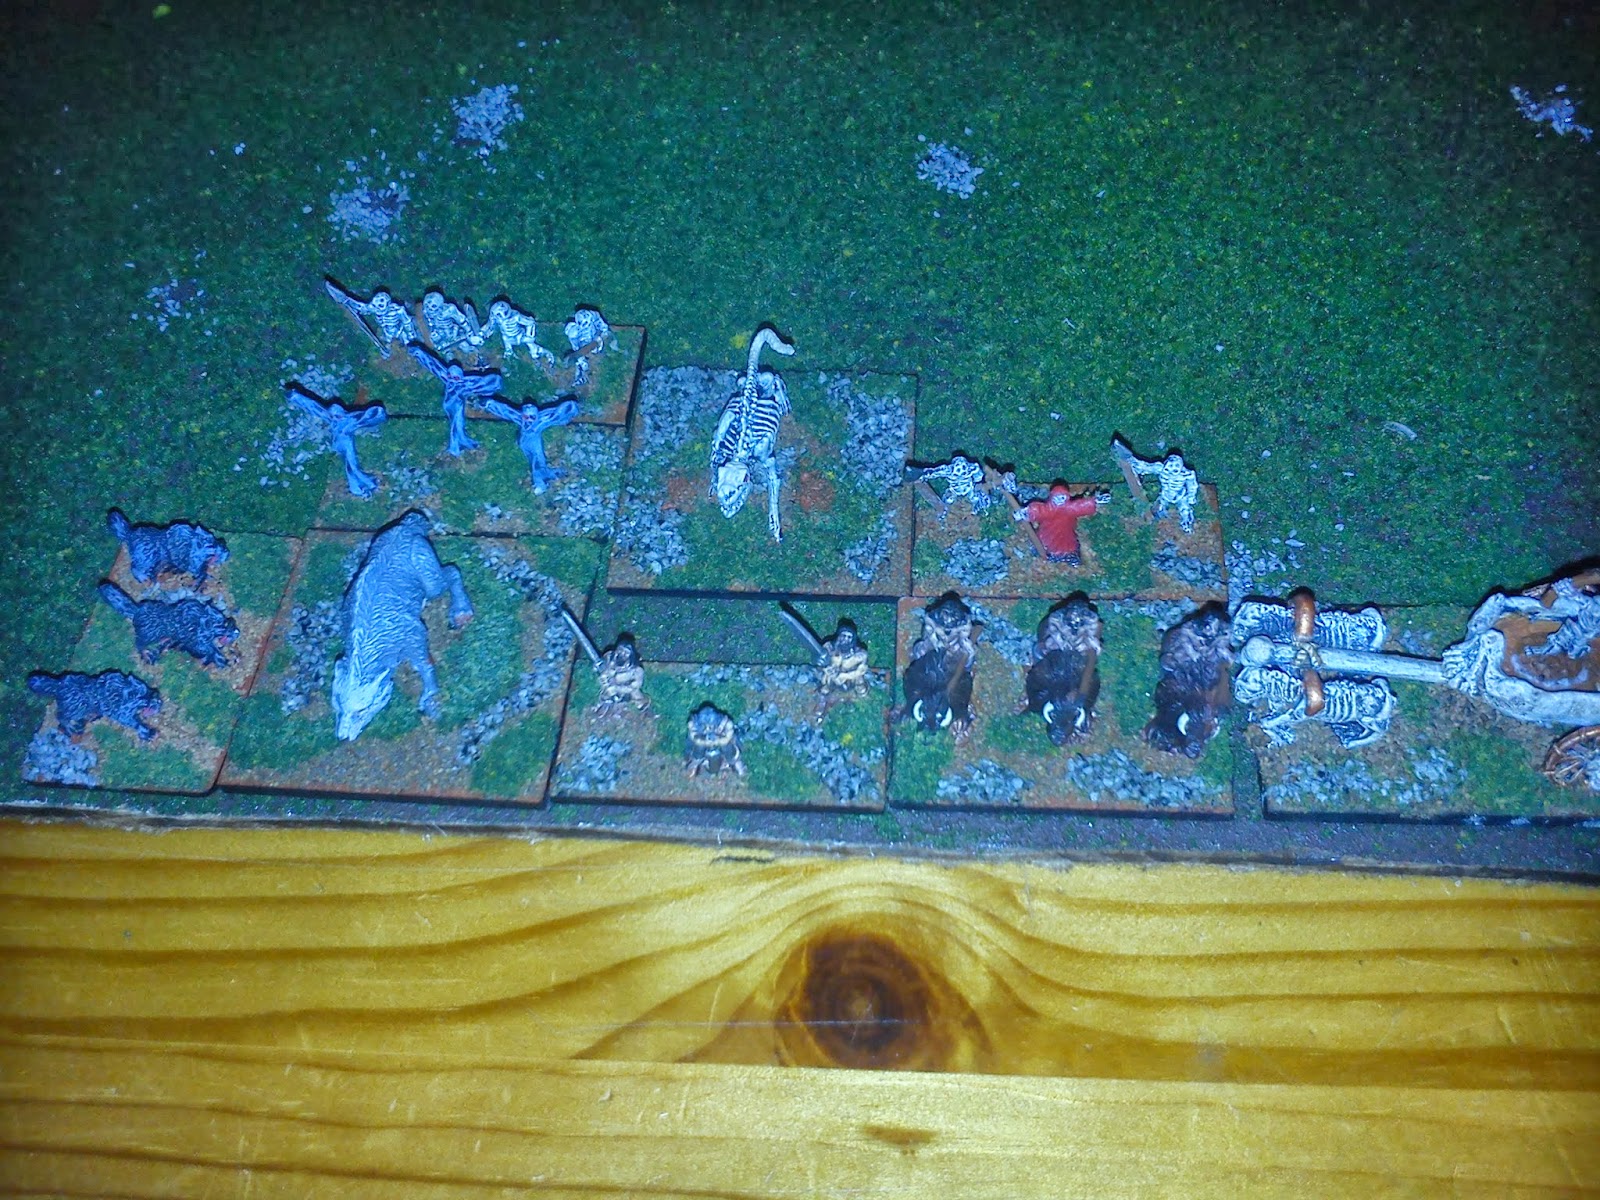
The end.... surrounded on all sides and charged from the rear, the Barbarian King is defeated.
A bad day for the Barbarians, who fail to seize the town from the Undead. They also have to fight off an attack from the Lizardmen this turn. The undead gain 50 Gold from the victory, but also have to fight off the Orcs at the Town, and are attacking the Orcs at the Fletchers. Could be a costly round for them...

Tuesday, 4 June 2013

Mighty Armies Campaign Game 3 - Orcs Vs. Undead at the Fletcher's Cottage

Our third battle of the Mighty Armies campaign saw Goblin's Undead face off against MBB's Orcs (actually my orcs, but MBB has no 10mm fantasy, so it was that or face off against the 3rd Reich in 6mm). It also saw the return of my patent pending "Shake-a-tron 3000 Blur-o-matic" mobile phone photography technique. Next game I WILL remember the proper camera.

The Orcs and undead legions were facing off for ownership of the Fletcher's Cabin. As a reminder, possession of this upgrades archers by 1 level, so from shooting 1 to shooting 2, shooting 2 to Long Ranged and Long Range to Artillery Range. The Undead started with possession, and also had the explosive ammo for their catapult as a result of holding the town with it's attendant Alchemist from the invading barbarian hordes in game 1

The cabin was placed in the centre and then 5 stands of trees were placed, alternating placement by each side with a random roll giving the Undead first placement. Goblin made a bit of a boo-boo here and placed three of the stands near his baseline. He had quite a shooty army build, with Long Ranged archers and the exploding ammo of his catapult, but he reduced their effectiveness by putting them all behind the LOS blocking trees. The Orcs Flying Beast had Scout, so could setup further forward than the other troops.

Setup

Turn 1
Turn 1 started with the undead making an aggressive charge up the centre with their wolf packs, and the bone beast levitating into the air to confront the Orcs flying beast. The Bone Beast and Flying Beast would proceed to dogfight for the next 3 turns, diving away or drawing in combat each turn.

The Orcs responded by advancing across the board, with all units pushing forward.

Turn 1


Turn 2
Limited movement on turn 2. The Undead moved up their heavies, the Vampire and Mummies, on the right and began to move their archers forward, looking to get out of the woods. The Orcs began to consolidate their right flank, advancing the Trolls and the Orc archers.

Turn 2

Turn 3
The limitations of the Shake-a-tron 3000 show up here, as all the other pictures apart from the one below of turns 3 and 4 are useless. On turn 3 the Undead advanced their wolf packs to the right and the Vampire and General straight forward setting up to threaten the flanks of any Orc cavalry charge. Unfortunately they were a bit premature, as the orcs general split off from the cavalry and advanced around the woods to allow the cavalry to use their mobility and charge the wolf packs and destroy them all. The undead archers continued to stroll through the woods as the trolls and Orc Archers moved into a position guarding the Orcs right flank.

Turn 4
On turn 4 the archers reached the edge of the wood and a gentleman's agreement said that the two half-stands that were out of the woods were as good as a single stand, so they had a pot-shot at the trolls. The mouldering bowstrings of the skeleton archers proved effective and one unit of trolls met their end. On the opposite side of the battlefield the Vampire Lord split off from the mummies to meet up with the single stand of undead cavalry and form another attacking force. The mummies advanced through the woods.  The dogfight between the bone beast and flying beast was concluded as the magics animating the bone beast were disrupted by the flying beasts attacks and it fell to the ground in pieces. On the Orcs turn the cavalry trampled over the corpses of the wolf packs to charge the Mummies. The now unoccupied Flying beast dropped down behind the mummies to support the attack. The combat was very close, and a single stand was destroyed. The mummies would have been pushed back, and thus destroyed by their retreat being blocked by the flying beast behind them, but they were fearless, so didn't need to retreat.


Turn 3/4
Turn 5
Turn 5 was over quite quickly. On their right flank the Orc archers fired on the skeleton bowmen emerging from the forest and killed one unit. On their left flank the Orc wolf rider cavalry and bone beast once again attacked the Mummies and destroyed the last stand. With more than 50% of his forces destroyed, the Vampire Lord was forced from the field and the Fletcher was left to the tender mercies of the Orcs.

With the first full campaign turn over the campaign map looks like this:


The Orcs and Lizard-men both own 4 territories and 2 special locations. The Undead have 3 territories and 1 special location and the Barbarians have been pushed back to just 2 locations. Next turn sees the Barbarians attack the Wizards Tower, the Orcs attack the Town, the Undead attack the Mill and the Lizard-men attack the Barbarians +10gp location. Favoured units will start appearing at the end of the next campaign turn too.

Thursday, 30 May 2013

Thoughts on the Mighty Armies Campaign

We now have the first three campaign games under our belt for the Mighty Armies Campaign I'm running with MBB, Orc and Goblin. Following these games, and some discussion on the nature of the special rules, we decided to tweak them a bit.

Firstly, here is the standard campaign map. I've added an extra node before each players homeland just to extend things slightly. We've also added a limited form of attrition into the game, in that each player has a starting treasury of 400 gold pieces that they have to pay for lost units out of, so some areas now give a gold piece bonus per campaign turn. The map shows the battles for turn one where there are two symbols in a territory. The addition of gold pieces also means we can do some nifty random events like mercenary troops turning up that the players have to bid for or a bazaar with some wondrous items.


At the moment there are four special areas:

Mill - gives +2AP to each battle fought

Fletcher - gives archers Shooting 2 or Long Ranged for free, or upgrades to artillery range if archers already have Shooting 2 and Long Range

Volcano - 50% chance to get a dragon for 1/2 price (5AP instead of 9AP) but -2AP if the roll is failed

Wizards Tower- 50% chance to get a wizard for 1/2 price but -2AP if the roll is failed

Alchemist - Explosive artillery ammunition. If an artillery piece destroys an enemy unit an adjacent enemy is also killed on a 4-6

MBB and Orc both failed the roll to get the Wizard and Dragon, so both lost 2 AP's. They both commented that the mill and the Fletcher gave decent bonus's without any risk, but the Wizard and Dragon could bot result in losses to the army. So, to that end we are modifying the dice roll to be 1-2, you lose 2 AP's of army, 4-6, you get the special character.


Extra Spells
I've also had a thought about some extra spells as well, prompted partly by a post I saw on making thorny hedges from an old loofah, which is something I want to try.

Barrier: Create a length of terrain that blocks line of sight and movement. It could be a thorny hedge, a wall of stones thrust up from below the ground, a flaming barrier or just a magical wall of force. Each MP spent will produce 2 x 40x20mm (that's the base size I use) sections of impassable terrain that blocks line of sight. Terrain lasts until the end of your next turn, but can be maintained by the expenditure of 1 MP by the magic user for every 2 sections of barrier as long as he remains within line of sight of it. Barrier has no effect on flying units.

Sunder: Used to destroy a Barrier. Spend 1 MP and roll a dice against the owner of the Barrier. If you roll higher, one stand of barrier is destroyed. If you want to try and destroy all stands of barrier, roll at -2.

Swift of Foot: Spend 1 MP and make a shooting 2 attack against a friendly unit. If successful they gain +1 inch to their movement (the shooting 2 attack is required because I want it to be harder for heavy units to move faster).

Sure of Foot: Spend 1 MP and make a shooting 1 attack against a friendly unit. If successful they gain the Mobility trait for this turn only (again, I want it to be harder for heavier units, and i wanted it to be harder to get than Swift of foot, as mobility is arguably more useful).


Favoured Units
I've also thought about the favoured units that we are going to use and have come up with the following special abilities table. After a battle, each player is allowed to make a single roll for a unit that took part in a battle and survived. Only one favoured unit of each type is allowed. If a group is destroyed in combat, it is lost and any replacements do not carry over the abilities.

Infantry:
1: Toughened Armour - Ignore the first failed combat result result once per battle. Instead treat it as a draw.
2: Perfect Drill -  Only needs 1MP to activate if group consist of 5 or 6 stands.
3: Tortoise! - If the unit suffers a casualty from archers, then roll a dice. On a roll of 6 they instead survive. This is in addition to any other rolls that might affect the result (i.e. scouts roll 5+ for their scout ability and if they fail can then roll again at 6+).
4: Wall of Blades - Enemies charge bonus is reduced by 1 (so a normal charge gives no bonus, a chariot gets +1 and a flying unit with a lance gets +2) 
5: Shock Troops - For the first round of combat roll one additional dice and pick the highest result.
6: Shield Wall - Unit is not subject to the -1 penalty if attacked in the flanks.

Cavalry/Chariot
1: Barding - Ignore the first failed combat result result once per battle. Instead treat it as a draw.
2: Horsemanship -  Only needs 1MP to activate if group consist of 5 or 6 stands.
3: Fine Steeds - Movement is increased by 1 inch.
4: Dragon Forged Lances - Charge bonus is increased by 1 (so a normal charge gives +2, a chariot gets +3 and a flying unit with a lance gets +4) 
5: Shield-breakers - For the first round of combat roll one additional dice and pick the highest result.
6:  Skilled retreat - If forced to retreat from combat, unit may ignore any single stand that would otherwise block it's path of retreat. If more than one stand blocks the unit or groups path, normal effects apply.

Monster
1: Tough Hide - Ignore the first failed combat result result once per battle. Instead treat it as a draw.
2: Well Trained -  Unit only counts as one stand for determining the size of a group for activation purposes.
3: Quickened - Movement is increased by 1 inch.
4: Dire Charge - Charge bonus is increased by 1 (so a normal charge gives +2)
5: Savage attack - For the first round of combat roll one additional dice and pick the highest result.
6: Terrifying Howl - once per battle your monster may spend 1MP to attempt to bind a unit or group as though it had cast the Bind spell.

Archer/Artillery
1: Pavaise - Ignore the first failed combat result result once per battle. Instead treat it as a draw.
2: Rapid Fire -  Artillery may move and shoot in same turn. Other units gain one re-roll per battle.
3: Skirmishers - Movement is increased by 1 inch.
4: Heartwood Staves - Range is increased by 1 inch. 
5: Defensive fire - When charged the group or unit may make a single shooting attack at the charging units before they enter combat. Any units destroyed are removed immediately. May not target units attacking from flanks/rear.
6:  Arcing fire - Archers/Crossbows may attack from rear rank of a group as though they had the Long Ranged ability. Units with Long Ranged already gain 1 extra inch or range. Artillery units gain 1 re-roll per battle.

General
1: Inspiring Banner - Rally actions now only cost 1MP
2: Personal Herald - May Rally a group or unit within 3" without being part of that group
3: Enchanted Armour - Ignore the first failed combat result result that would target this unit once per battle. Instead treat it as a draw.
4: Blessed/Cursed Weapon - May roll one extra dice in the first round of combat and pick the highest result.
5: Art of Waaaaagh! - You may roll two dice for initiative and pick the best result.
6: War chest - Before each battle roll a dice. On a 1-4 there is no effect, on 5-6 you gain 2 extra AP to buy troops with.

Spellcaster
1: Spell Gem - Spell Gem gives d3 extra MP's at the start of a battle that may only be used to cast spells. Only one extra MP may be spent per turn.
2: Scrye - Once per battle you may force an enemy to re-roll one dice and you can pick the result you prefer.
3: Homunculus - Ignore the first failed combat result that would target this unit once per battle. Instead treat it as a draw.
4: Wand of Power - Range of all spells (including Ring of Teleport) is increased by 1 inch. 
5: Dancing sword - Support is increased by 1.
6: Ring of Teleport - Once per game, and at any time (even during the enemy turn), you may move the spellcaster 5 inches in any direction to a location that they can draw line of sight to.


Sunday, 26 May 2013

Mighty Armies Campaign Game 2

We managed to get the next next two battles in for our Mighty Armies campaign this weekend.

First up was a clash between the Barbarian Hordes and the Lizard-folk nations over possession of the Wizards Tower. The Barbarians, the owners had already petitioned the wizard for aid, and he had declined, frying two AP's worth of the hapless Barbarian envoys. Clearly he does not like to be disturbed. This, then, was a 42 vs 44 point battle. It should have been a 42 vs 46 point battle, as the Lizard-men have possession of the Mill, which should give them +2AP's, but I forgot I had it when constructing my army....

I didn't get a set-up picture of the first battle, so I added the unit names to the picture for the end of Turn 1 below.

Turn 1

Both sides got a good quantity of MP's this turn, and mostly moved into position. The Lizard-men made an advance on the right and left with cavalry and monsters, and the Pterosaurs riders headed straight for the wizards tower. The Barbarians advanced across the board too, with the Hawk man swinging in to support the Bison.

Turn 1
 Turn 2

The Lizard-men won initiative on turn two and repositioned the Pterosaurs to fire on the advancing Bison. They managed to bring one of the shaggy beasts down with a flurry of javelins. The Lizard-man general advanced to support the flank of the raptor riders towards the standing stones.The Barbarians were hampered by getting just a few MP's this turn, something which plagued them all game. The catapult crept forward and hurled a boulder at one of the Lizard-man generals flanking bodyguards, squishing them with a volley of well placed boulders (I missed the star off below, I notice).

Turn 2
Turn 3

The Lizard-men won initiative again this turn. The pterosaurs advanced on the catapult and felled it with a hail of javelins. The swamp beast and it's handlers advanced on the left and the general and his remaining bodyguard advanced behind the inn. The barbarians again had only a few MP's. The hawk man advanced towards the centre and avenged the catapult crew by shooting down one of the pterosaurs. The king and the shaman climbed up onto the hill crest on the left.  

Turn 3
Turn 4

The Lizard men again won initiative this turn. On the right the raptor riders charged the bison, with the general and his warriors just being able to join in to support. The combined weight of the raptors, with their charge bonus and the support of the general and his bodyguard were enough to massacre the whole unit. We used an optional rule that instead of the whole unit being destroyed if you double your opponent, you lose 1d6 units instead. As it happened the roll was a 3, so all the bison riders will killed anyway... The pterosaurs engaged the hawk man in air-to air combat, but he managed to evade them both. On the left the swamp beast and handlers ascended the hill, ready to take on the Barbarian king The Barbarians got a decent amount of MP's this turn, so used them to good effect. The shaman called on the spirits of the elements and blasted both of the swamp beasts handlers with bolts of lightning. The general and the Shaman then charged the swamp beast and the Barbarian king gained much glory by slaying the beast. The dire wolf, seeing the threat on the left flank was ended, turned around and loped back up-table to support the warriors in the centre.

Turn 4
Turn 5

Turn 5 saw both armies consolidating and manoeuvring  The Lizard-man general reorganised his army so he was leading from the front, then swung them around to face the Barbarian warriors. The pterosaurs and the hawk-man continued to wheel and dive in the sky with no casualties. The Barbarian king and shaman advanced down off the hill and the warriors wheeled to face the Lizard-man cavalry. The battle was now at a tipping point. The barbarians only had to lose one more unit before losses became too much and they had to quit the field, but the Lizard-men only had to lose 2 and they'd be in the same situation.

Turn 5
Turn 6

No picture for turn 6. It was all over very quickly. The lizard-men only got a few MP's this turn, but only needed one. One of the Pterosaurs riders disengaged from the fight and  hurled a flurry of javelins down at the nearest Barbarian warriors, felling them where they stood. As the Barbarians had lost over half their army, they were forced to quit the field. The lizard men rejoiced all night and fed on Bison, whilst Barbarian prisoners glumly watched in wooden cages, pondering if they would be next on the menu.

A couple of shots of the Lizard-men troops, since I didn't take any close-ups during the game. They are all from Pendrakens Tribal Lizardman and Newtman ranges and are the first 10mm figures I ever painted. I tend to do my bases differently now, so they don't quite match the game board. They are also based 3 to a stand mostly, whereas most of my other armies have 4 to a stand for regular troops and either 2 or 3 for heavy infantry. There is a nice variety in the Tribal Lizardman range, so I have plenty to mix and match if i choose to re-base.

Pterasaur rider. Or possibly a pterosaurs. Or possibly a pterodactyl.

Heavy infantry.

Three flavours of infantry.


Monday, 20 May 2013

Mighty Armies Campaign game 1

I had Orc and Goblin over at the weekend. MBB was due to come over too, but a scheduling mix up meant he wasn't here at the same time as the younglings. They both said they wanted to play with the armies that AGG and I had painted for them at Christmas, so we set up a quick 44 point game, with flying units. Whilst choosing armies, we also decided to start up a quick campaign. Between the three of us we worked out a nodal campaign map for four players (Me, Orc, Goblin and MBB). I'm working on a campaign map for us, but we decided that certain locations would give certain benefits. We worked out the following:

Mill - extra supplies. Gives owning player 2 extra army points for each battle

Fletcher - Archer units get Long Ranged for free, or if already long ranged can use artillery range.

Volcano - You can try and persuade a Dragon to join you for 1/2 price. Roll a dice. 1-3 he eats 2 army points worth of troops, 4-6, dragon for 1/2 price (flying monster)

Wizards Tower - you can try and persuade a wizard to join you for 1/2 price. Roll a dice. 1-3 he turns 2 army points worth of troops into frogs, 4-6 buy a magic user for 1/2 price (can't also be general)

Town - Alchemist. Your artillery gain exploding ammunition. If a unit is destroyed by an artillery shot, roll a dice. 1-3, no effect, 4-6 another unit adjacent to it in a group is also destroyed.

We decided that the campaign would be over once one player owns the majority of the locations, and that if a players home location was destroyed, he'd carry on playing but as a vassal of the conqueror. To keep it simple we assume that each empire always has enough troops to field an army, so there are no rules for attrition or supply. We did say that each player can nominate one Group that can gain experience from game to game, but haven't decided how that will work yet.

Here's a rough draft of the campaign map:

Still a work in progress....
The players are:

Orc - The Barbarian Hordes
Goblin - The Undead Legions
MBB - The Orcs of the Red Hand
Me - The Lizardfolk Tribes

We started the campaign turn off by each player selecting a territory to advance into. The board quickly filled up until there were no empty spaces left and we had to advance into enemy territory. This resulted in three battles this turn:

Barbarians vs. Undead in the town.
Lizards vs. Barbarians at the Wizards Tower 
Orcs versus Undead in the mountains

We decided to play the first battle in the town. The Barbarians had claimed Wizards Tower, and the Undead the Fletcher, so they built their armies accordingly. The Barbarians petitioned the Wizard to join them, but Wizards being the cantankerous things they are he declined and blasted away two of The Barbarians army points, so they started with 42 instead of 44 (we normally play with 44 point armies and flying units as standard).

The armies lined up:

Initial setup

The river was impassable except at the two fords and the bridge. The fords were difficult going. The town blocked line of sight and the forests blocked line of sight and were difficult going.

Turn 1

Turn 1 saw initial manoeuvring on both sides. For the Undead the bone beast and wolf pack moved along the Eastern flanks into the woods. The Barbarians moved their Bison Cavalry to the west and advanced the warriors towards the eastern ford. The pictures were all taken with my phone camera, so apologies for the  variable quality:

Blurry turn 1

Turn 2

Turn 2 saw the Barbarians continue their advance. Their Shaman got line of sight to the mummies on the western flank and bound them in place. The Undead began to put their long-ranged archers in place to cover the western ford, and the wolf pack and bone beast moved through the forest. The flying Vampire general took to the field and moved up to support the eastern thrust.

Turn 2
Turn 3

Turn 3 saw the Barbarians gain initiative again. The Barbarian King had the Tactician skill, so gained +1 to his initiative roll each turn. The Bison Cavalry moved up and crossed the western ford. In the centre the King and Shaman advanced into the town, and the catapult slowly advanced. On the east the warriors held position  just out of range of the wolf pack, and the dire wolf moved up to support them. The catapult took a pot-shot at one of the wolf packs, but to no effect.

The Undead only had a few command points this turn, so had to pick carefully. The archers wheeled in place and fired on the Bison, killing one of them.

Archers in position...

The wolf pack and bone beast moved up towards the ford, but couldn't quite reach it.

Turn 3
Turn 4

Turn 4 saw the Undead win initiative. They only had a few maneuver point this turn, so on the western flank they finally roused the mummies into action to try and protect the archers, but it seemed to be too little, too late. They also diverted the bat swarm to bolster the archers and fired on the Bison to no effect. The wolf pack and bone beast held their ground as they were blasted by lightning no less that three times by the Shaman, fired on by the artillery and then charged by the barbarian warriors. They warriors, hampered by the difficult terrain of the ford, lost the battle and had a stand killed and were pushed back. The wolf packs rampage meant that they could follow up, and their mobility meant they were unhindered by the difficult terrain of the ford, so they immediately chased the fleeing barbarians down.

In the west the Bison riders charged the archers and bat swarm and emerged victorious. One stand of archers was killed and the rest recoiled.

Barbarians flee, chased by the wolfpacks.
Turn 4

Turn 5

I forgot to take any pictures on turn 5, so my colourful prose will have to suffice. The bat swarm flew back to support the Vampire, who moved into the town ready to confront the barbarian king. The wolf pack attacked the barbarian warriors in the rear and destroyed them. The archers wheeled in place and fired on the bison riders to no effect. The bison in turn charged and killed the archers. The catapult fired on the wolf pack and killed one, and the hawk man conducted a surprise attack on the rear of the group and the other!

Turn 6

I've included the casualties for turn 5 and 6 in the picture below. The barbarians won initiative this turn. The king advanced onto the bridge with the shaman. The bison cavalry wheeled around the village and the catapult fired on and killed the bone beast. In the Undead turn the vampire advanced onto the bridge and the bat swarm flew and landed behind the Shaman and the King. Caught between that Vampire and the Bat Swarm, the Barbarian king and his Shaman were both killed.

Turn 6
Turn 7

Turn 7 was mostly consolidation for the final battle. The vampire flew north to join the mummies and single stand of Skeleton Warriors. The hawk man and Dire Wolf moved up ready to join with the Bison Cavalry. The catapult fired on the landed bats on the bridge and killed them.
Turn 7
Turn 8

Turn 8 saw the Barbarian forces link up as the undead shuffled about in place.

Turn 8
Turn 9

Turn 9 saw the barbarian forces charge, with the hawk men diving to the rear in a surprise attack. Unfortunately for the barbarians, even with the assistance of the dire wolf and the hawk man surprise, the might of the vampire and his Mummies was just too much. All of the bison cavalry, and the hawk man, were destroyed. The Dire wolf made his death save and loped off howling. With just a catapult and the Dire Wolf left, the Barbarians had been roundly defeated.


 This was a really fun and exciting battle, and the fortunes wavered back and forth several times. With the Undead now in control of the town and the fletcher's, next campaign turn will no doubt see a very shooty undead army emerging (although Goblin has enquired about undead, flying, heavy cavalry - a scary thought!). We realised afterwards (well, I realised) That's missed off a few important rules, like the proper victory conditions, and how armies react when generals are killed, but we'll fold them in for the next game.


Tuesday, 8 January 2013

Super-fast 10mm Fantasy armies and Orcs vs. Barbarians


I've lured my two nephews into 10mm Fantasy gaming with a couple of games of Mighty Armies recently. It plays quickly, the rules are simple, and it doesn't take loads of room.

They both expressed a desire to get their own armies after a few games, so I decided to pick them up some Pendraken figures to make up around 80AP of mixed troops for each of them as Christmas presents.

The figures arrived on 21st December, but I had to go away on holiday with the in-laws, so didn't get a chance to put paint to figure until Christmas eve.

AGW (Amazing Geek Wife - she insisted I change it from AGG) pitched in, and between us we painted, based, flocked and varnished about 80 stands in just over 7 hours, including a couple of periods of drying time for paint, glue and varnish.

One army was Undead, almost entirely Skeletons, and AGW had a dry brushing production line going of black undercoat, old GW bleached bone and new GW ceramite white. She was really impressed by the contrast and how effectively the bone and white picked out the detail on the skeletons. I picked out weapons and wood on the skellies whilst she started in on the other army - Barbarians. They got an airbrushed Tamiya Flat Brown undercoat, GW Talarn Flesh drybrush and then GW Dwarf Flesh drybrush. I then picked out loincloths, hair, wood and weapons. They then got a generous wash of Devlan Mud.

I lucked out when looking at my D&D Miniatures for a couple of Monsters for their armies (monsters are powerful units in Mighty Armies) - I had a suitable dire wolf for the barbarians and a dire wolf skeleton for the undead - ideal!

We started painting at just before 5pm and I got the final mist of Testors dullcoat on at about 2am, ready to let them air out overnight.

The nephews came over last week and we had a game with one of the armies (Goblin had misplaced his army - temporarily, I'm hoping), the Barbarians, facing off against my Orcs of the Red Hand (Orcs at the bottom, Barbarians at the top).


On the first turn both armies started to move into position. On the left flank the Barbarian hero and heavy cav moved up and began to circle to the left of the woods. The dire wolf and the archers moved into the centre of the board and the Shaman moved up with them. On the right flank the Barbarian King moved forward, the archers moved up to just behind the hill and the catapult slowly ground forward.

The Orcs were hampered by bad rolls for manoeuvre points, meaning they could move fewer units. On the left, the catapults moved forward and wheeled slightly towards the centre and the archers moved up towards the hill and wheeled left. The Shaman moved forward to gain line of sight past the archers. On the right the furthest flying monster flew towards the town and the General and his infantry block marched forwards.

Bison Cavalry move around the woods.

Hero and his infantry (with Dwarf support) move ahead of the flying monster.

The hero, archers and flying monsters and shaman (actually trolls)

Turn 2 saw more manoeuvres  The barbarians edged past the woods on the left, the archers mounted the hill on the right and various suspicions parties ambled forward in the centre.

Dire wolf says "Bark! Bark!"

Turn 3 saw the Orcs flying monster make an attack on the archers isolated on the hill. With strength 5, plus aerial charging bonus, the monster expected an easy victory. However, the Orcs abysmal dice rolling struck again....

Monster charges archers....

Archers defeat monster.

On the left flank the (not) Troll shaman tried a risky spell, bind unit, hoping to hold the Bison cavalry in place.  An opposed roll, with the bison getting +2 as the Shaman was trying to effect all of the unit, not just one stand, but he succeeded and the Bison riders were mired in place.

Stuck!

The Orcs took advantage of this and one of the flying monsters charged the mired bison riders. 

The Orcs Flying Monster tears into the Bison cavalry

Unable to effectively fight back (their dice roll is halved if mired), they were recoiled, losing a unit. But, a unit that recoils whilst bound is instead destroyed. A harsh lesson for us all in how powerful the bind spell is ( this was the first time we had used magic) 

In the centre the Barbarians flying monster moved up to threaten the phalanx of Orc wolf riders. Behind it the Barbarian heavy infantry shuffled around to protect their flanks, and the lone bison rider on the right and the hawk-men moved up towards the village.


At this point I made a big mistake. I forgot to shoot the catapults. They were well in range of the dragon, who was unengaged, and they'd have 3 shots at 5+ to kill the dragon (who gets a 5+ save as he's a monster). This was shortly to prove my undoing... 

The Dragon charges behind the Orc lines and engages the catapults that were apparently having a tea break..

To great effect.

Long view downtable. 

In the next turn the Orcs split the generals command on the right into two, and prepared to send two stands off into the village to meet the bison/hawk-man combo. The remaining units, along with the wolf riders, moved up, preparing to engage the Barbarian hero and his infantry support (which included a stand of Dwarf mercenaries, as we ran short of Barbarian infantry). The Dragon continued his rampage behind the lines by engaging the Orc archers who had turned to face him, causing a casualty and recoiling them back nearly into their own hero. The Barbarian archers fired on the Orc General, causing two casualties.

Preparing to charge the hero.

The next turn saw the final conflict of the fight. The Barbarian archers moved down off the hill. The Barbarian shaman tried, and failed, to pin the wolf riders and the hero wheeled to let the archers cover his left flank The wolf riders and the giant spider then charged the Barbarian hero and the Orc general and his last remaining stand of infantry charged the Bison Cavalry in the village. 

Archers move down off the hill and the Orcs charge.


CHARGE!!!!

The Orc charge smashed into the Barbarian line, but the light cavalry, even with monster support, weren't enough to break the Barbarian lines. The unit was recoiled, losing one stand straight away. Monsters don't recoil, so the spider stayed put, but the unfortunate Orc wolf riders had to retreat straight back a full move, sending one of them straight into the lava pits.

In the village the Orc General recoiled the Bison cav and the barbarians lost the supporting hawk-man.

The next turn was the final one. The retreating Orc cavalry were blasted by a lightning bolt from the barbarian shaman and the giant spider was shot to bits by the archers (who had had a good day).

On the left flank, the two Orc flying monsters ganged up on the dragon and managed to destroy it. With the end of the 6th turn the game was over, and the Barbarians claimed a very credible victory over the Orcs.